Common Questions When Using Patient Connection:
How to Schedule an Appointment Using Patient Connection (Step-by-Step Guide):
1). From any page on our website, click on the MIC Digital Assistant button (bottom right-hand corner) or click Book an Appointment at the top of the window to begin.
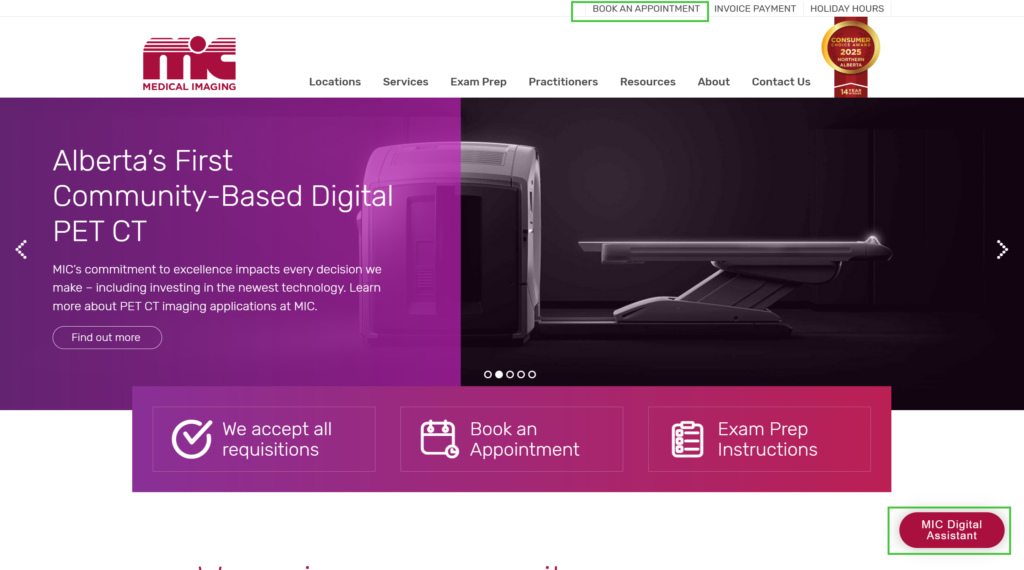
2). If you use the MIC Digital Assistant button, a pop-up screen will provide you with information for online bookings. Scroll to review all of the available information. If you use the Book an Appointment link at the top of the window, you must scroll down and click the “Book an Exam” button.
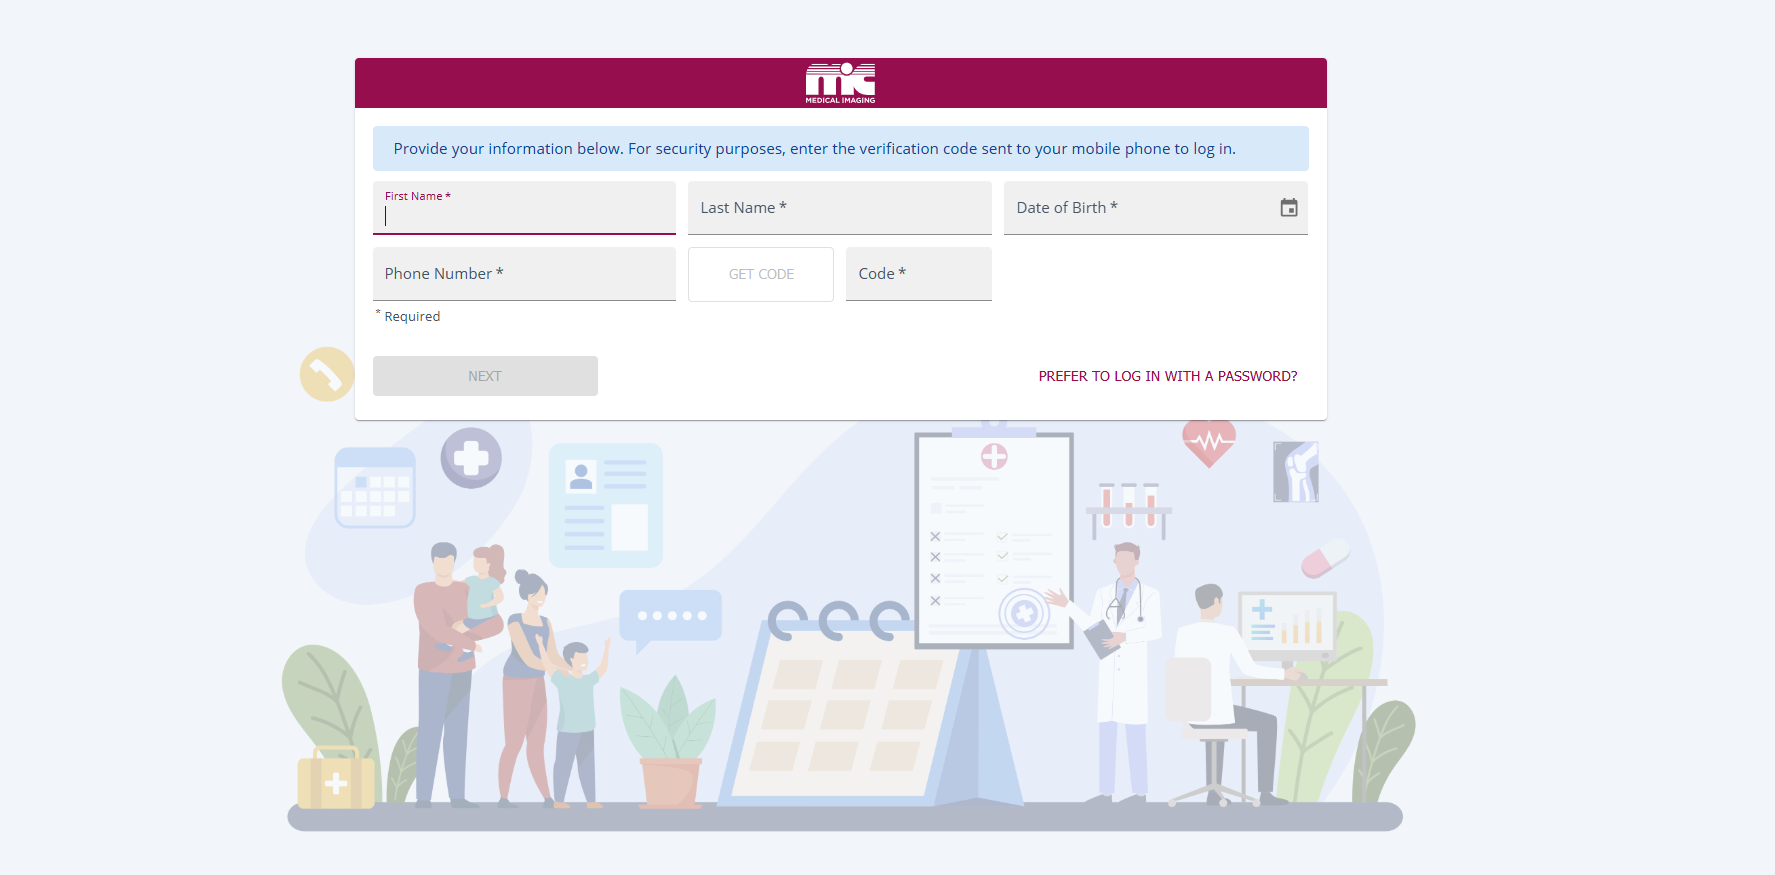
3). You can log into MIC Patient Connection by creating an account (password needed) or log in with an SMS code (passwordless login).
- If you are an existing patient, you will need to use the name, date of birth and phone number provided to MIC to get logged in. If you are having any issues getting logged in, please contact MIC at 780-450-1500 to confirm your information on file.
- If you are a new patient to MIC, you can still use Patient Connection by setting up a new account. Enter your name, date of birth, and phone number to create an account at MIC to enable Patient Connection access.
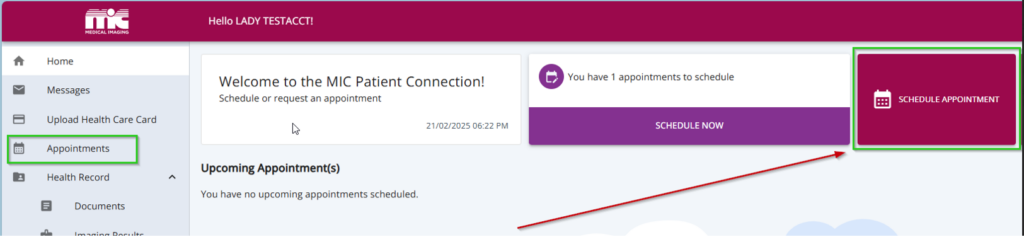
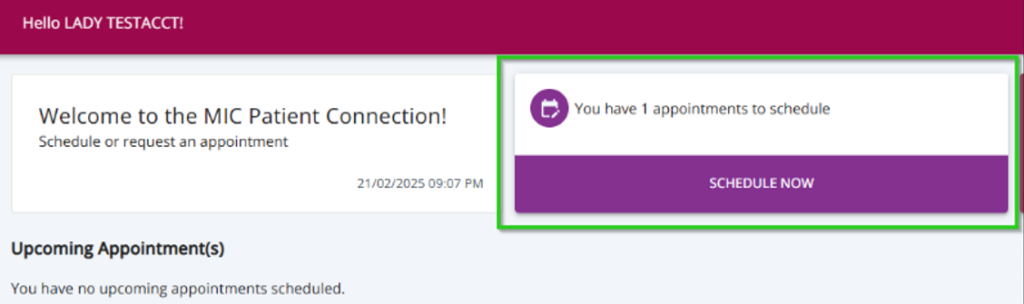
4). Once logged in, click the SCHEDULE APPOINTMENT button or the Appointments tab on the left Menu.
5). Click Schedule New and scroll to find the type of exam that you would like to schedule, e.g. Mammography, Ultrasound. Check the exam that matches the one(s) selected on your requisition. At the bottom of the screen, click Next.
- Note: If you do not see your exam listed, scroll to the bottom of the options listed and select Request appointment. You will need to upload your requisition, and the request will be submitted to MIC to review. Once reviewed, you will receive a text message notification that the appointment is now ready to be scheduled. Please log back into Patient Connection and click the SCHEDULE NOW option on the home page and follow the steps.
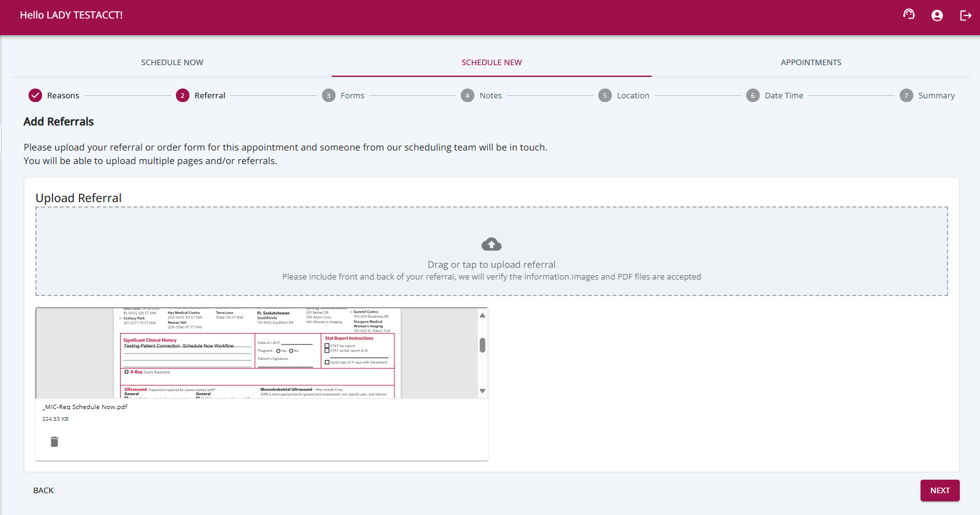
6). Upload the requisition from your referring doctor. Click Next.
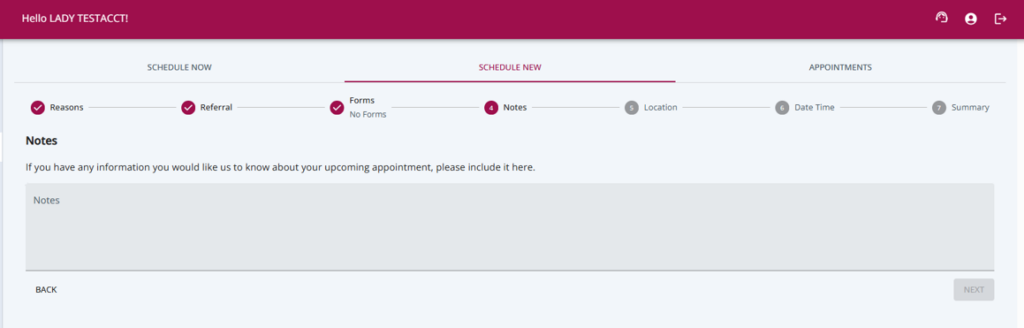
7). Add any notes you wish to include about your upcoming appointment. Click Next.
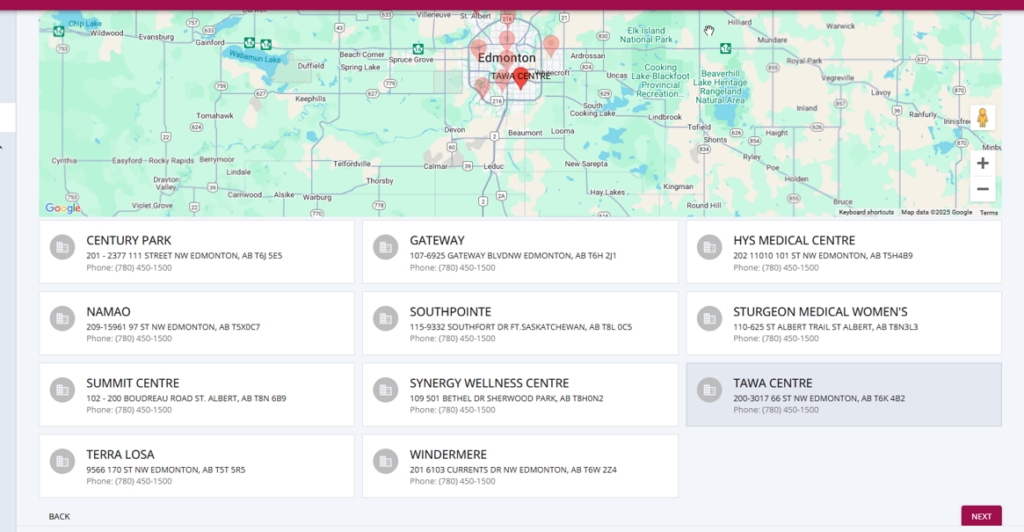
8). Select the location where you would like to schedule your appointment. Currently, you can only select one location at a time. Scroll down and click Next.
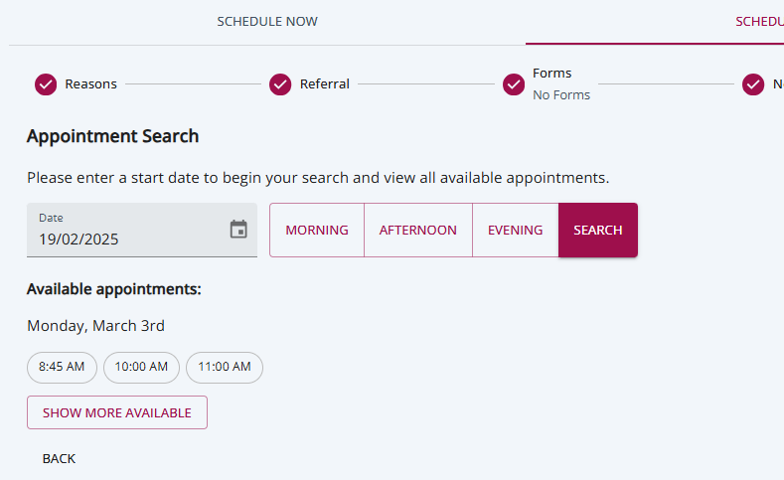
9). Search for available appointment dates and times at the selected facility. If your search returns no results, move your date range out by 30 days to extend the search. Click Next once you have selected a new search start date.
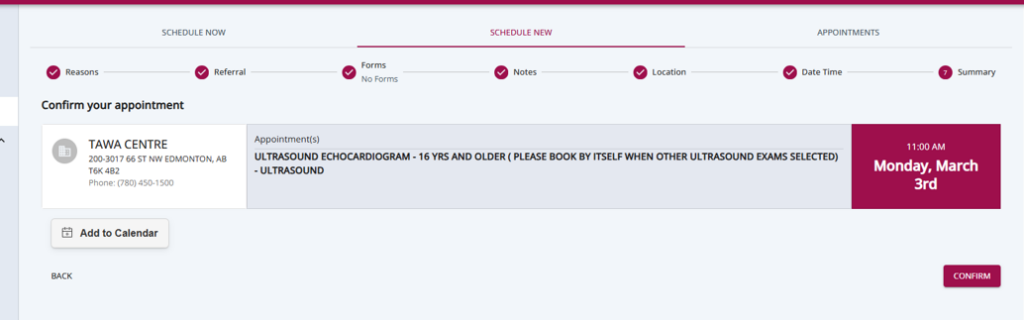
10). Once you have chosen an appointment date and time, you can add the appointment to your calendar and then click the Confirm button.
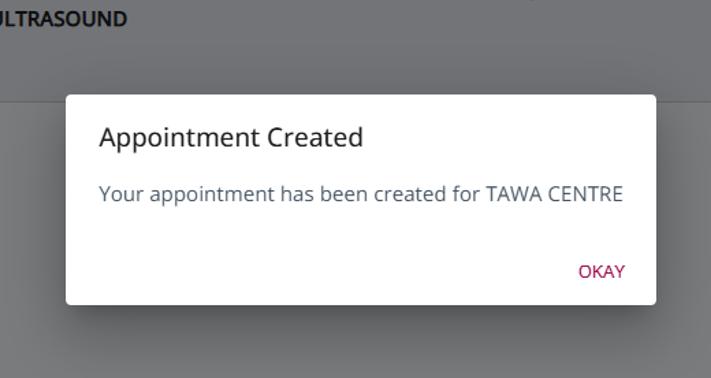
11). Your appointment has been booked! Click Okay.
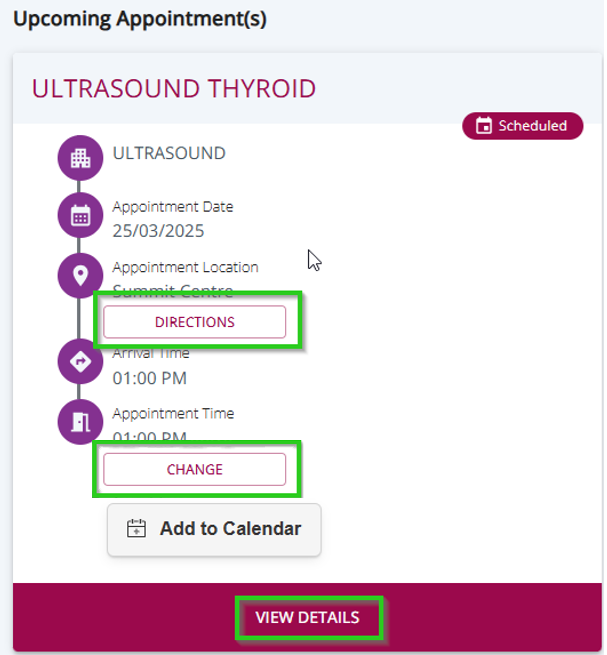
12). You can now view that appointment on the home screen. Review preparation instructions or forms (if applicable) by clicking View Details. You can reschedule/cancel the appointment by clicking the CHANGE button and view DIRECTIONS to the clinic location.
13). You will also receive a confirmation email or text message for your appointment, with exam and location details and applicable preparation instructions.